
From Clutter to Clarity: How to Mass Delete Records in Netsuite
How to Mass Delete Records in NetSuite
When dealing with high-volume data accounts, regular data cleanup becomes essential. Whether you're cleaning up your development account after performance testing or consolidating data from multiple instances during a company merger or acquisition, knowing how to mass delete records in NetSuite is invaluable. However, it's important to note that the methods outlined here are effective only for records that do not have dependencies. For example, if a sales order has related transactions such as invoices, you'll need to delete these related invoices first before you can remove the sales order. Ensure that all dependent records are removed before proceeding with the mass deletion to avoid errors.
1. Using the Record List UI
Yes! You can mass delete via the user interface, but there are a few prerequisites to meet first.
Prerequisites
- Set up the record for inline editing.
- Ensure there is a field that can be inline edited, such as the name field. Inline editable fields are represented by a pencil icon when viewing the list of records.
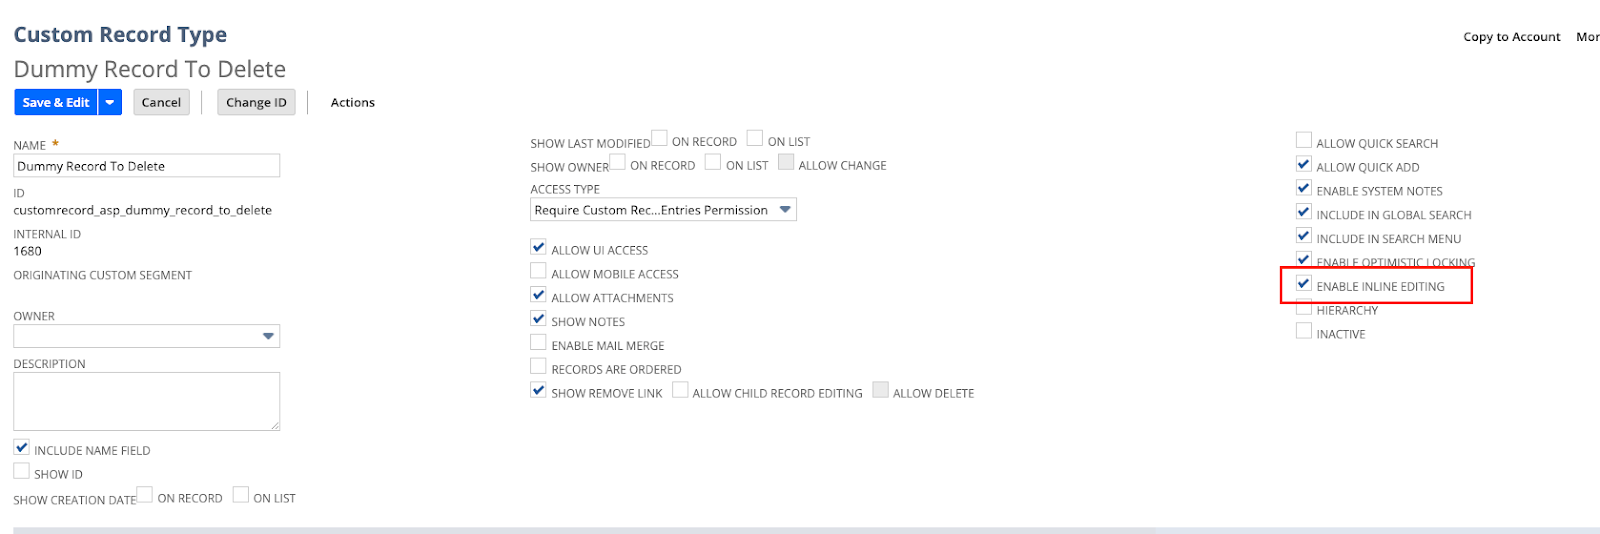
Enable inline editing.
Perform Mass Deletion
Once the prerequisites are satisfied, follow these steps:
- Navigate to the records list.
- Enable inline editing by toggling the “Edit” option beside the “Show Inactives” checkbox.
- Click on the editable field of the record to be deleted.
- Hold Shift and click on the last record on the list.
- Press Delete; a confirmation dialog appears.
- Click OK.
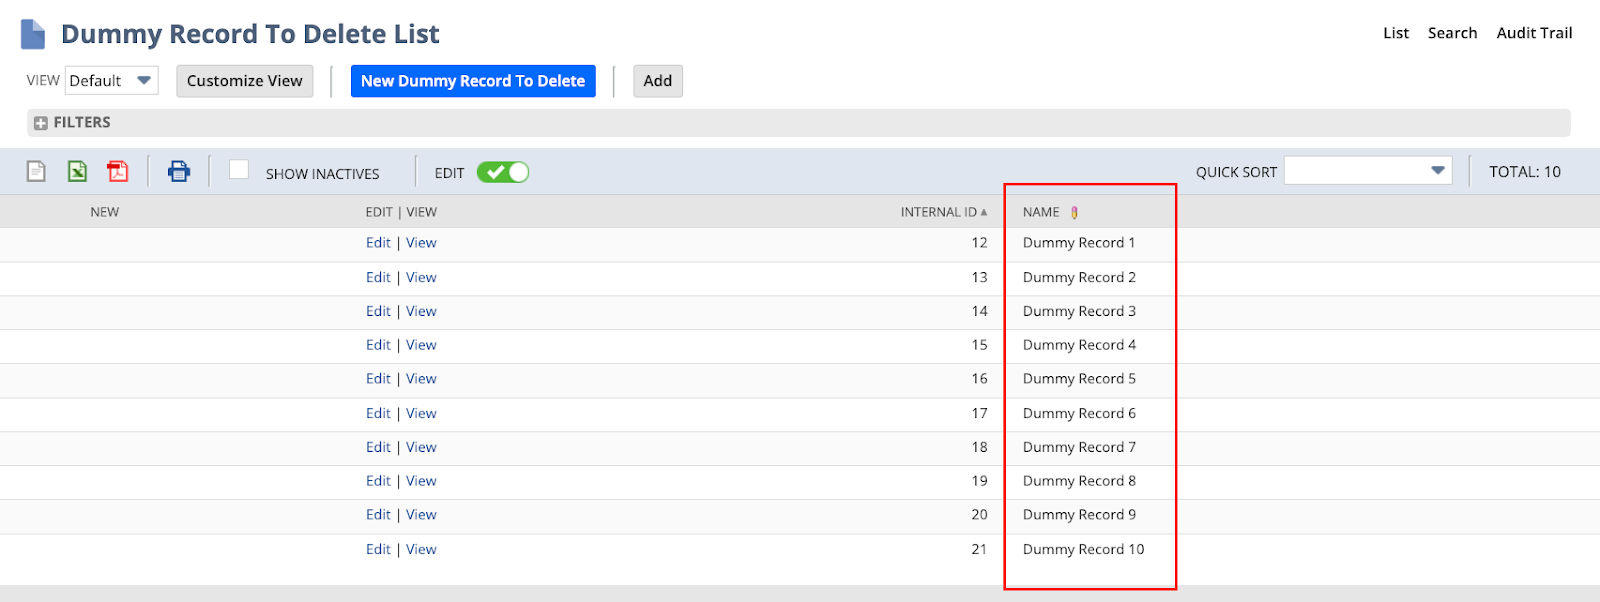
Highlight the records for deletion.
Here's a video demonstrating these steps: Mass-Deleting-Records-via-UI
2. Using Mass Update Script
Preqrequisites
- Create a mass update script that deletes the records.
/**
* @NApiVersion 2.1
* @NScriptType MassUpdateScript
* @NModuleScope SameAccount
*/
import {EntryPoints} from "N/types";
import * as record from "N/record";
export const each: EntryPoints.MassUpdate.each = (({type, id}) => {
record.delete({
type,
id
});
});
2. Deploy the script on the records to be deleted.
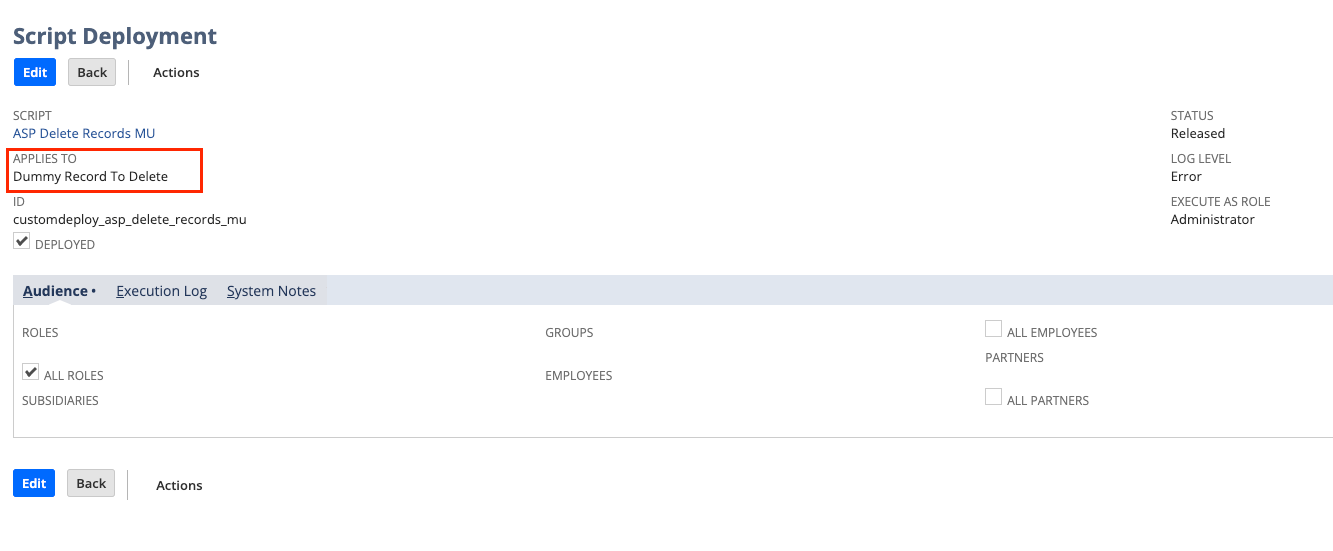
Execute Mass Update Script
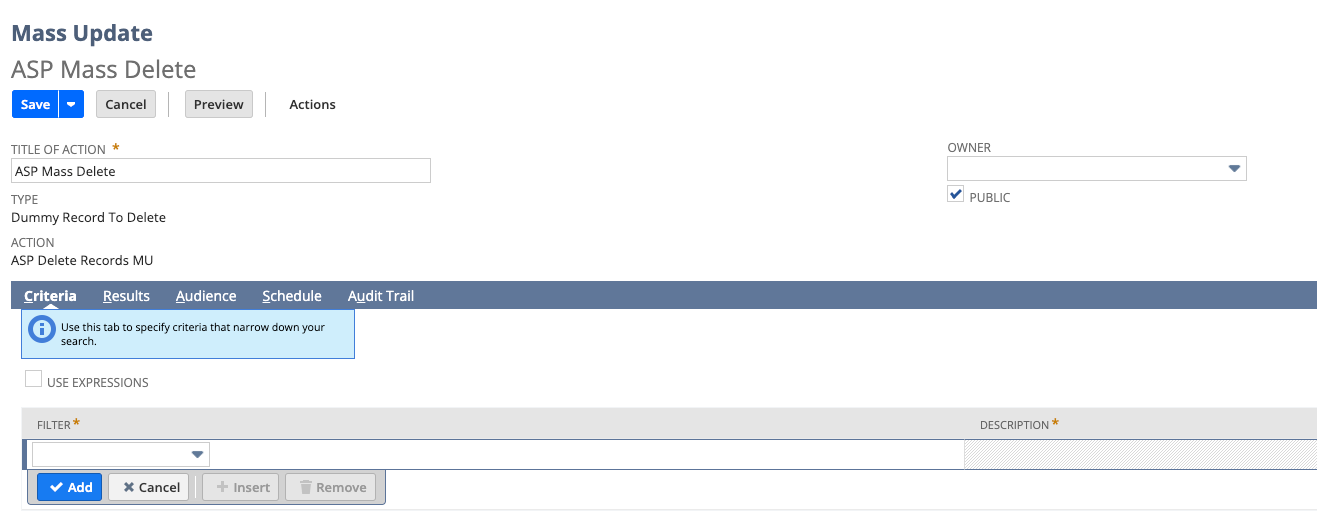
- Create a Mass Update
- Navigate to Lists > Mass Update > Mass Updates
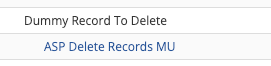
- The created mass update script deployment will be available under Custom Updates.
- Click on the created mass update script deployment
- Click “Save”
2. Perform Mass Update
- Navigate to Lists > Mass Update > Saved Mass Updates
- Click “Preview” of the created Mass Update
- Click "Perform Update".
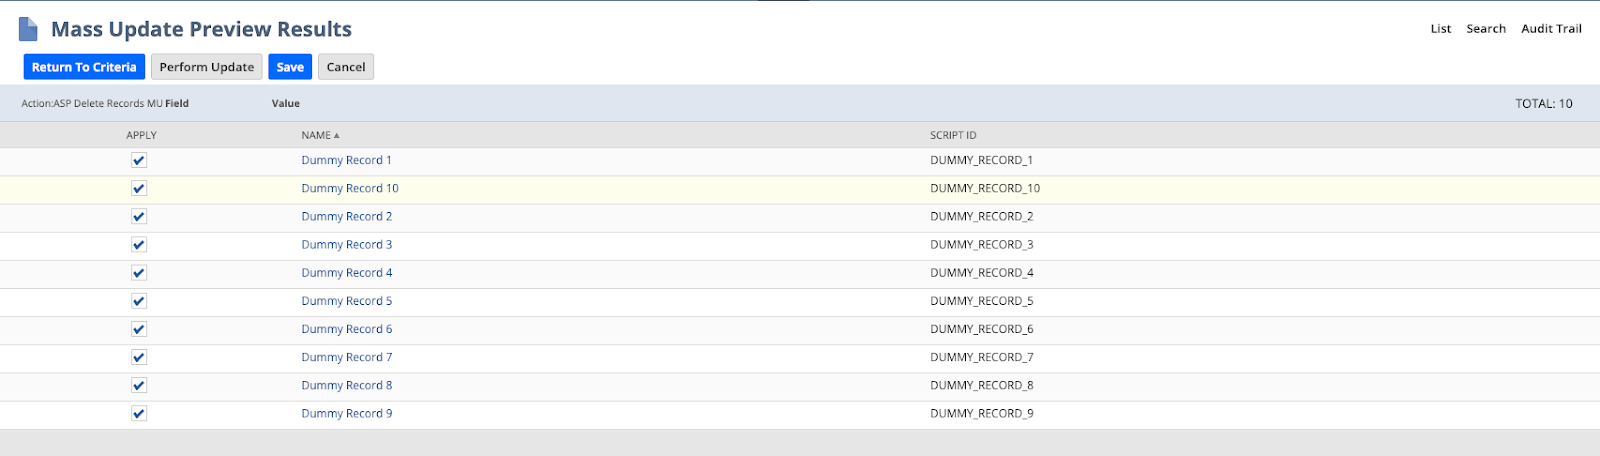
Record results for deletion.
3. Using Workflow Action Script
Prerequisites
- Create a workflow action script that deletes the records.
/**
* @NApiVersion 2.1
* @NScriptType WorkflowActionScript
* @NModuleScope SameAccount
*/
import {EntryPoints} from "N/types";
import * as record from "N/record";
export const onAction: EntryPoints.WorkflowAction.onAction = (({newRecord}) => {
const {type, id} = newRecord;
record.delete({
type,
id
});
});
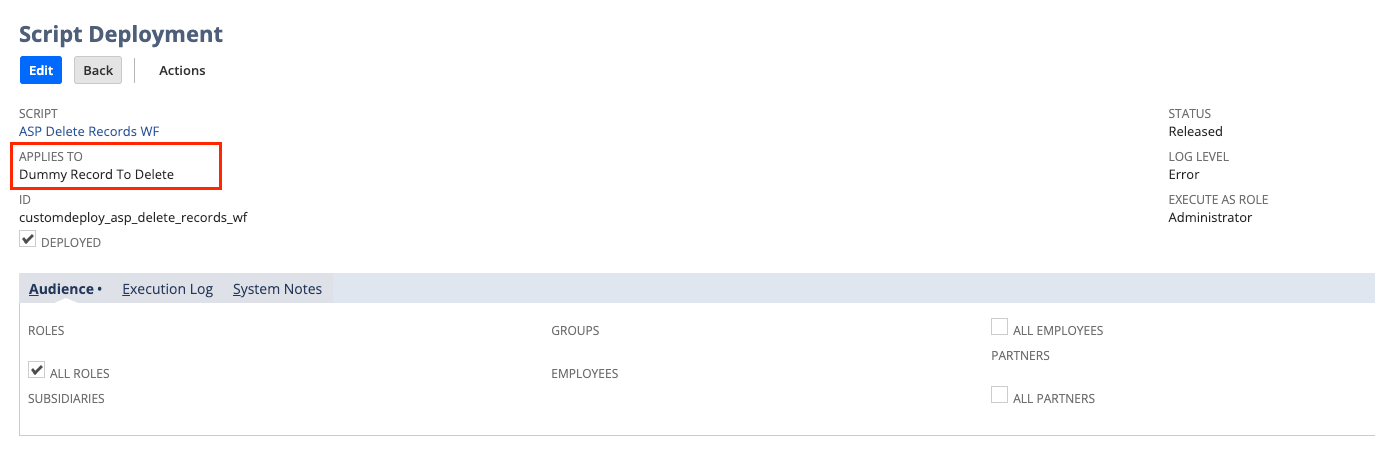
2. Deploy the script on the records to be deleted.
3. Create a saved search for the records to be deleted (ensure there is at least one criteria).

Execute Workflow Action Script
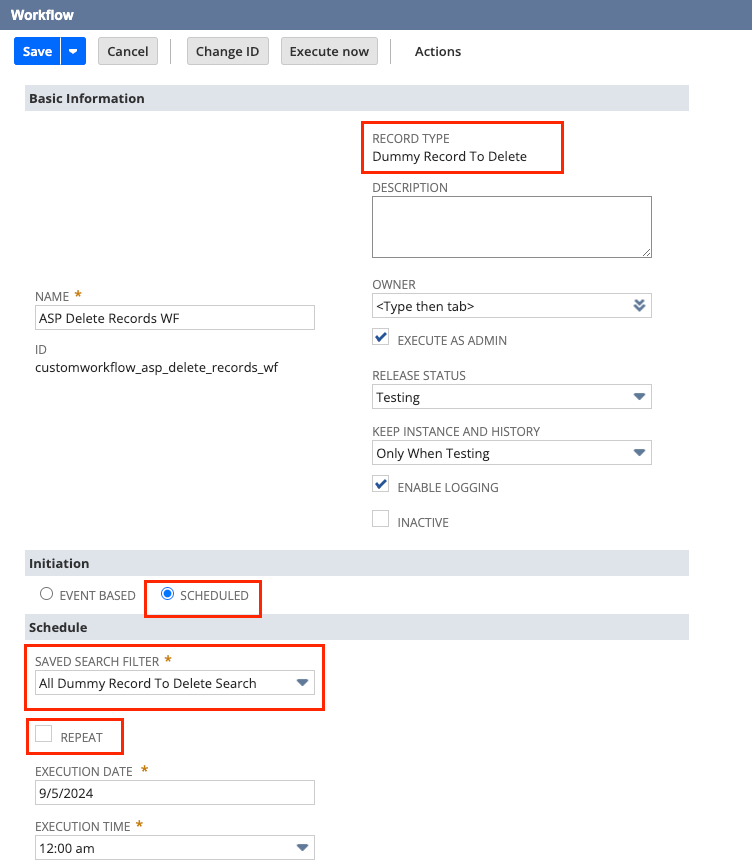
1.Create a Workflow
- Navigate to Customization > Workflow > Workflows > New.
- Set Record Type to the record you want to delete.
- Set Initiation to Scheduled.
- Choose the saved search you created under Saved Search Filter.
- Uncheck "repeat" to prevent re-execution.
2. Create a Workflow Action in Statesome text
- Select the state and click “New Action”.
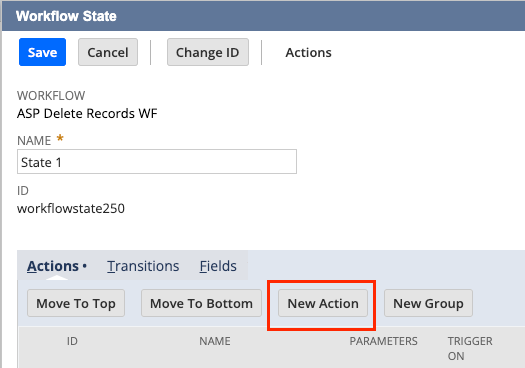
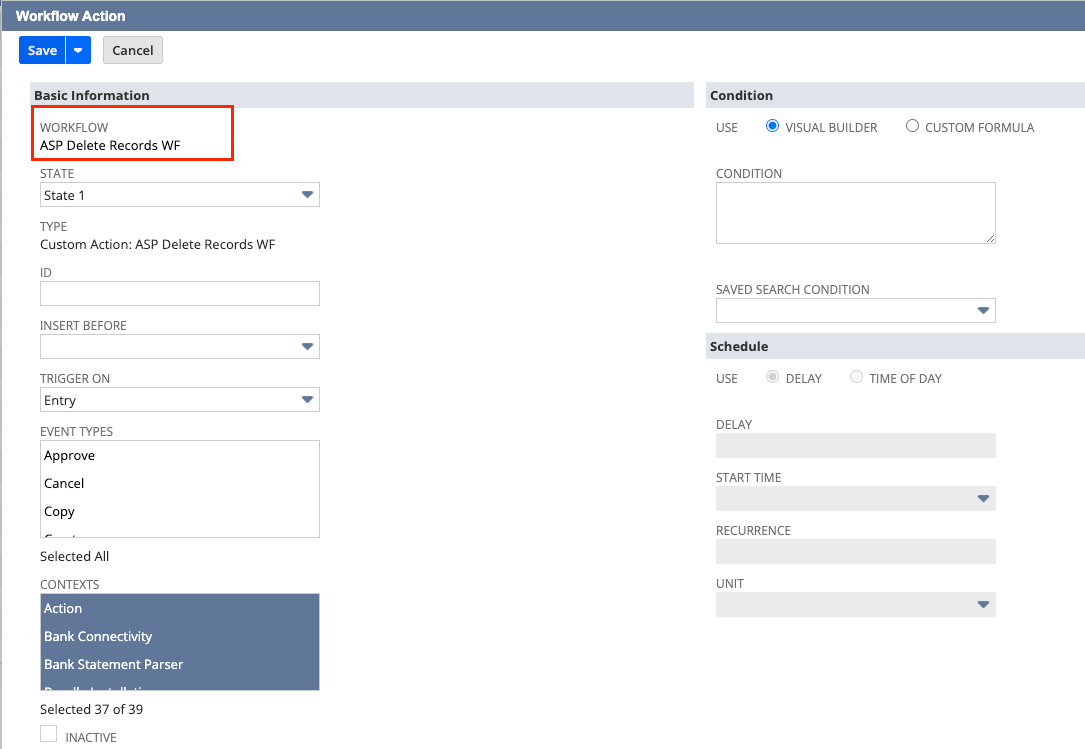
- Create a state action using the deployed workflow action script.
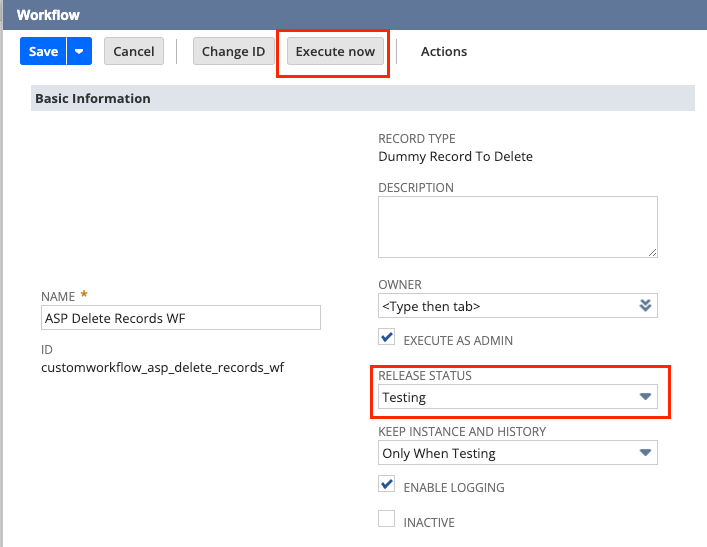
- Execute Workflow
- Navigate back to Workflow
- Schedule or execute it immediately. To execute immediately, ensure Release Status is “Testing” and click “Execute Now”.
4. Using Map/Reduce Script
Prerequisites
1. Create a Map/Reduce script that deletes the records.
/**
* @NApiVersion 2.1
* @NScriptType
MapReduceScript
* @NModuleScope
SameAccount
*/
import
{EntryPoints}
from
"N/types"
;
import
*
as
record
from
"N/record"
;
import
*
as
runtime
from
"N/runtime"
;
import
*
as
search
from
"N/search"
;
export const
getInputData: EntryPoints.MapReduce.getInputData = () => {
const
currentScript = runtime.getCurrentScript();
const
RECORDS_TO_DELETE_SEARCH =
"custscript_asp_records_to_delete"
;
const
savedSearchId = currentScript.getParameter({
name: RECORDS_TO_DELETE_SEARCH
})
as
string;
return
search.load({
id: savedSearchId
});
};
export const
map: EntryPoints.MapReduce.map = (
scriptContext
) => {
const
{key: id, value} = scriptContext;
const
type =
JSON
.parse(value).recordType;
record.delete({
type,
id
});
};
2. Include a parameter “Records to Delete Search” in the script record to allow dynamic input on which records to delete.
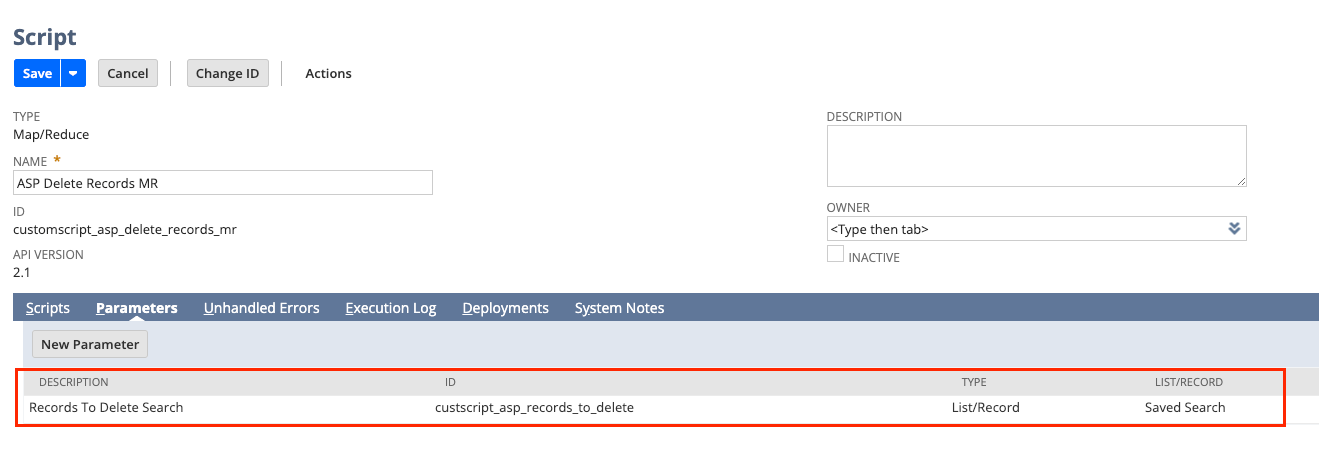
3. Create a saved search for the records to be deleted.
Execute Map/Reduce Script
1. Deploy the created script
2. Set the saved search you created in the “Records to Delete Search” parameter.
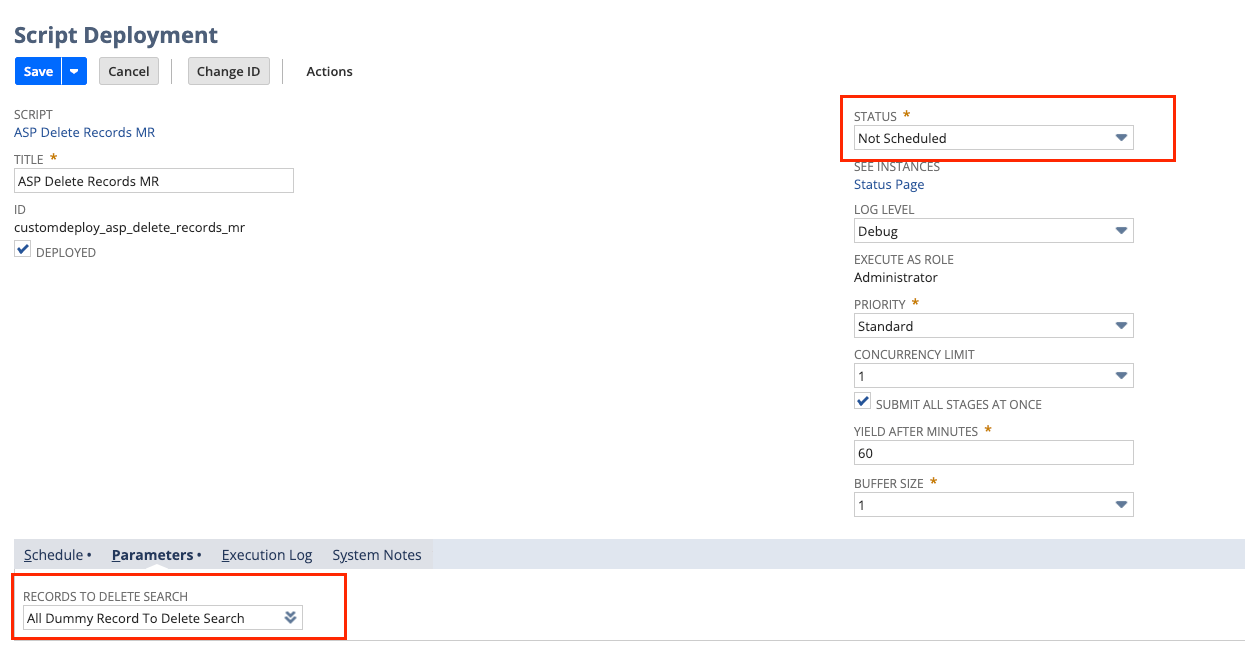
3. Schedule or execute it immediately. To execute immediately, ensure Status is “Not Scheduled” and click “Save & Execute”.

Final Thoughts
The best method depends on your needs. If you need to quickly delete a few records, the record list UI is your go-to. For handling large volumes of data with more flexibility, consider mass updates, workflow actions, or Map/Reduce scripts.
To see the complete SuiteScript code and implementation details discussed in this article, visit Jona's GitHub repository.

Meet the Author
Jona has over a decade of experience in SuiteCloud Development on the NetSuite platform. She specializes in implementing advanced solutions and has led teams in creating high-quality software. Jona holds multiple certifications and has been recognized with awards like the Summit Award and Quality Champion Award.
Tags
Accelerate ERP Success with Expert Solutions
Ready to put what you've learned into practice? ATSOURCE delivers both the specialized talent and comprehensive NetSuite support you need to turn strategy into results.Connect with our experts today and move from planning to performance.